1、收集图像
图像来源有很多种,这里为了方便我编写了一个python脚本用来爬取图片
import os
import requests
from bs4 import BeautifulSoup
# 定义动物类别列表
# animal_categories = ['狗', '猫', '狮子', '大象', '老虎', '熊', '鹿', '羊', '猴子', '海豚']
animal_categories = [
'柯基',
'鹦鹉',
'眼镜蛇',
'熊猫',
'猴子',
'斑马',
'犀牛',
'老虎'
'海洋生物',
'羊',
'狼',
'长颈鹿'
'狐狸'
'大象',
'小猫咪',
'昆虫',
'哺乳动物'
'爬行动物',
'鱼'
]
img_style = '现实摄影'
# 遍历动物类别列表
for category in animal_categories:
# 创建保存图片的文件夹
folder_path = f'D:/animal_spider/{category}'
if not os.path.exists(folder_path):
os.makedirs(folder_path)
# 初始化计数器
count = 0
# 初始化图片链接集合,用于去重
image_urls = set()
# 搜索动物类别的图片
while count < 100:
url = f'https://cn.bing.com/images/async?q={category}-{img_style}&count=50&first={count+1}&scenario=ImageBasicHover&datsrc=N_I&layout=RowBased_Padding&mmasync=1&dgState=x*0_y*0_h*0_c*4_i*60_r*9&IG=DA63F0145102447E8C64585C437BE3D5&SFX={count}&iid=images.5595'
response = requests.get(url)
soup = BeautifulSoup(response.content, 'html.parser')
image_elements = soup.find_all('img', class_='mimg')
for image_element in image_elements:
try:
# 获取图片链接
image_url = image_element['src']
# 判断图片链接是否已经爬取过或者和之前爬取的链接相同
if image_url not in image_urls:
image_urls.add(image_url)
# 下载图片
response = requests.get(image_url)
image_data = response.content
# 图片命名规则:当前爬取的动物类别+爬取序号(100张中的第几张)+jpg或png文件后缀
file_name = f'{category}_{count+1}.jpg' if '.jpg' in image_url else f'{category}_{count+1}.png'
file_path = os.path.join(folder_path, file_name)
with open(file_path, 'wb') as file:
file.write(image_data)
print(f'Saved {file_path}')
# 更新计数器
count += 1
# 判断是否已经爬取足够数量的图片
if count >= 100:
break
except Exception as e:
print(f'Error occurred: {str(e)}')
continue
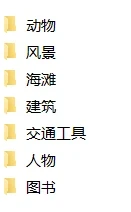
通过修改参数进行多次爬取最终按原计划我得到可分为7组分类的图像集
2、制作相册分类数据集
现在我们需要根据收集得到的图像集,制作成可供模型训练的数据集,分别保存成四个文件:
-
train_images.npy
-
train_labels.npy
-
test_images.npy
-
test_labels.npy
读取这四个文件并打印文件的形状大小:如train_images:(, , * , 3)查看数据集的制作情况
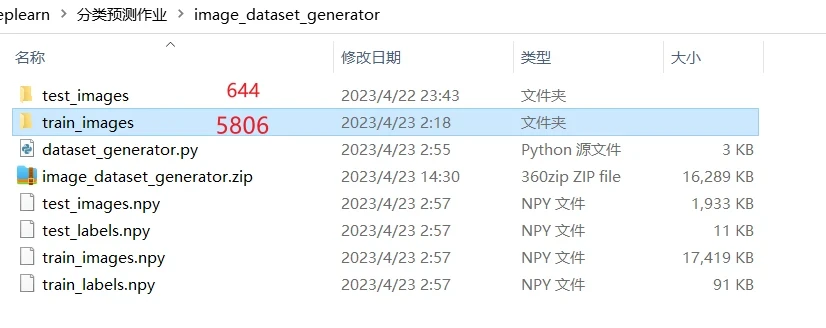
接下来在这个图像数据集生成器的例子中,我会采取如下目录结构:
image_dataset_generator/
├── dataset_generator.py # 包含图像数据集生成代码
├── train_images/ # 训练图像目录
│ ├── class1/
│ ├── class2/
│ └── ...
└── test_images/ # 测试图像目录
├── class1/
├── class2/
└── ...
这样整个项目具有清晰的层次结构,目录名和文件名都简洁明了。这使得此项目很容易被他人阅读和理解。
训练图像集和测试图像集
(1)处理图像集
- 训练图像目录:用于模型训练的图像数据集目录。模型会基于这个目录下的图像和标签进行学习和优化。
- 测试图像目录:用于模型评估的图像数据集目录。我们会使用已经训练好的模型对这个目录下的图像进行预测,并与真实标签比较,得出模型的精度等指标。
如果你只有一个图像数据集目录,那你有两个选择:【我也只有一个图像集】
- 将整个目录指定为训练图像目录,然后从中抽取部分图像作为测试集进行模型评估。这种情况下,你需要将抽取出的测试图像移到测试图像目录。
- 将大部分图像指定为训练图像目录,只留一小部分作为测试图像目录。比如8:2或者9:1的比例。然后模型只基于训练图像目录进行学习,用测试图像目录进行评估。✔️
对于只有一个图像数据集目录的情况,我更推荐第二种做法。因为如果你从训练集中再抽取测试集,模型很有可能会过拟合于测试集,而不能很好的泛化到新数据上。
所以,结论如下:
如果有多个图像数据集目录:
- 其中较大的指定为训练图像目录,用于模型训练
- 较小的指定为测试图像目录,仅用于模型评估
如果只有一个图像数据集目录:
- 将大部分(比如80-90%)图像指定为训练图像目录,用于模型训练
- 将少部分(比如10-20%)图像指定为测试图像目录,仅用于模型评估
- 不要从训练集中再抽取测试集
本案例我就采取了将图像集中大部分图像指定为训练图像目录,只留一小部分作为测试图像目录,取9:1的比例
(2)开始编写制作脚本
图像集的问题彻底处理好后就开始编写dataset_generator.py脚本来生成数据集吧。
基本步骤如下:
-
遍历train_dir和test_dir目录下的类别文件夹,获取图像路径和对应标签
-
读取图像,并resize到(32, 32)
目的是使所有图像具有相同的高、宽和通道数,以方便模型训练(要确保和模型的输入一致)。我们可以使用 OpenCV 或 PIL 等库进行图像resize。
-
将图像和标签分别保存为NumPy数组
-
将数组保存为.npy文件
目的是将图像数据集保存为.npy格式的数组文件,方便模型训练读取。
-
读取保存的文件并打印其形状
需要注意的问题:
-
OpenCV的版本与Python的版本问题可能导致部分语法不一样
-
OpenCV对图像的格式有一些要求,另外最重要的一点就是中文路径问题需要额外小心专门处理一下(如非必要,不使用中文最好),当然了也可能有文件的权限问题出现
参考代码:
#!/usr/bin/env python
# -*- coding: utf-8 -*-
import os
import cv2
import numpy as np
# 训练和测试图像路径
train_dir = './train_images/'
test_dir = './test_images/'
print('读取训练图像...')
# 遍历训练图像目录获取图像路径和标签
train_img_paths = []
train_labels = []
for cate_dir in os.listdir(train_dir):
print(f'处理类别:{cate_dir}')
for img_path in os.listdir(os.path.join(train_dir, cate_dir)):
print(f'读取图像:{img_path}')
train_img_paths.append(os.path.join(train_dir, cate_dir, img_path))
train_labels.append(cate_dir)
print('读取测试图像...')
# 遍历测试图像目录获取图像路径和标签
test_img_paths = []
test_labels = []
for cate_dir in os.listdir(test_dir):
print(f'处理类别:{cate_dir}')
for img_path in os.listdir(os.path.join(test_dir, cate_dir)):
print(f'读取图像:{img_path}')
test_img_paths.append(os.path.join(test_dir, cate_dir, img_path))
test_labels.append(cate_dir)
print('读取并resize训练图像...')
# 读取并resize训练图像
train_images = []
for img_path in train_img_paths:
print(f'读取图像:{img_path}')
image = cv2.imdecode(np.fromfile(img_path, dtype=np.uint8), cv2.IMREAD_COLOR)
image = cv2.resize(image, (32,32))
train_images.append(image)
print('读取并resize测试图像...')
# 读取并resize测试图像
#
test_images = []
for img_path in test_img_paths:
print(f'读取图像:{img_path}')
image = cv2.imdecode(np.fromfile(img_path, dtype=np.uint8), cv2.IMREAD_COLOR)
image = cv2.resize(image, (32,32))
test_images.append(image)
# 转换为numpy数组
train_images = np.array(train_images)
train_labels = np.array(train_labels)
test_images = np.array(test_images)
test_labels = np.array(test_labels)
# 保存为.npy文件
np.save('train_images.npy', train_images)
np.save('train_labels.npy', train_labels)
np.save('test_images.npy', test_images)
np.save('test_labels.npy', test_labels)
# 读取并打印文件形状
train_images = np.load('train_images.npy')
print(train_images.shape)
train_labels = np.load('train_labels.npy')
print(train_labels.shape)
test_images = np.load('test_images.npy')
print(test_images.shape)
test_labels = np.load('test_labels.npy')
print(test_labels.shape)